In the previous chapter we saw how to interact with Python. In this chapter we want to start using it to do interesting stuff, but before we’ll spend some time improving our work environment.
First we’ll introduce screen, a wonderful piece of software that will allow you to do many things at once within the terminal, without losing track of any; get used to screen, and you won’t be able to be without it.
Once we understand screen we’ll learn how to install Python packages.
By the end of the chapter you will know how to use screen to work in parallel workspaces within the terminal. You will have also learned how to find and install Python packages, and you’ll know a bit more about system administration. You will have a rather nice Python environment set up, and we’ll use it to take a mathematical detour that will give you a feeling of the many cool things you can do easily with Python once you know your way around. You may, of course, skip the last part if you don’t care about math: read the first parts, were we talk about screen and Python packages, and move on.
The case for improving your work environment
It is good that you experiment with your work environment, and figure out how to tailor it to your needs. And not only for the obvious fact that you might spend many hours a day in front of your computer, and you’d rather be comfortable. The best work happens when the computer does not interfere between you and your task. The interface to the computer should be as transparent to your thought processes as possible, the interaction effortless and automatic. Only then your attention will be focused, and your work your best1.
It might be that one of the reasons that makes the UNIX work environment so compelling is that it lends itself so well to tuning and automating, leaving plenty of room for you to find your perfect setup. Most things can be done with keyboard shortcuts that can be learned until they become almost autonomous. When in Emacs, my fingers reach out for C-x C-s every now and then without me being fully aware of it; movement between applications happens with Command-TAB; the mouse is hardly ever touched.
Because I think (and this is a strongly felt guess, but a guess nevertheless) that reaching for the mouse, and aiming at a place to click, creates a much higher cognitive load on your brain than just letting your fingers press a fully automated chord in the keyboard. And I’d much rather have my brain working out the problem at hand than thinking about what it’s doing with the mouse.
Running things in parallel with screen
When you have been working at the terminal for a while there may be quite a bit of information in it. Its value is usually in the short term —whatever you want to store for the future you’ll stash away in a file and save it— but it is important anyway. It is your command line history, environment variables you might have declared, a Python session in which you have defined a couple of helper functions, and have stored some values in variables that you are using to perform repetitive computations.
The time will come in which your work-flow will make you close valuable sessions. For example, you are working with the Python interpreter when you realize that you need to install a new package, and while you are at it you need to check if a library is installed. You’d rather not interrupt the interpreter, and you’d rather not leave your package installation to check the library out.
There’s a simple solution: start a new terminal or, if on macOS, open another window with Command-n (or another tab with Command-t). But it quickly becomes cumbersome, you end up with lots of terminal windows in your screen, and it’s not the best way. The best solution is to have multiple workspaces within your terminal, which is what screen does for you. And it is the best because it works, it is based on easy-to-automate keyboard commands, you find it everywhere, and it affords you some measure of permanence between sessions.
Starting screen
Enter
clear
in your terminal to clean up. We’ll be showing how screen works with a little experiment, and keeping things tidy will help. We are just about to start creating parallel workspaces and moving among them, and it might get confusing. So we are going to leave tracks, writing something recognizable; type something like this:
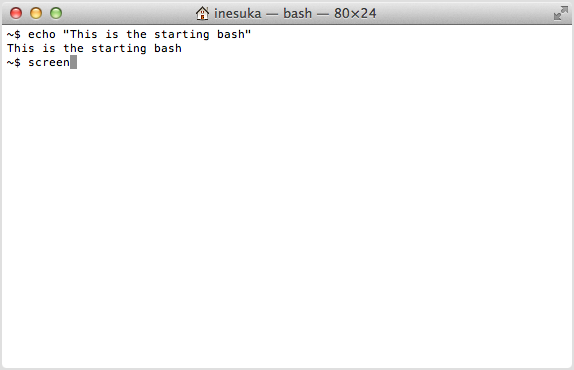
echo "This is the starting bash"
And now prepare to run screen. This is what you should see just before you press enter, after typing screen:
Once you press enter you will see a page-long description (check it out, you might see an invitation to send pizza to the authors). Pressing space or enter will clear this page and start screen proper. You should see a new, clean shell. Let’s leave a track,
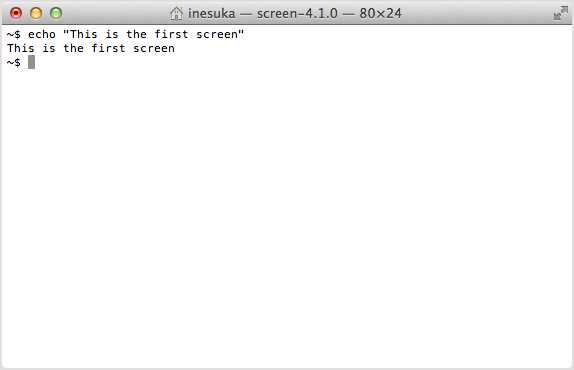
echo "This is the first screen"
Your terminal should now look more or less like this:
Creating a new screen workspace
Type C-a c, and you’ll find your terminal looking like a new shell again. The screen man page calls it a window, but I’ll use workspace because it does not look like a window at all. Leave a track for later,

And, just for fun, build another one, C-a c again, and echo to know where you are:
Moving between screen workspaces
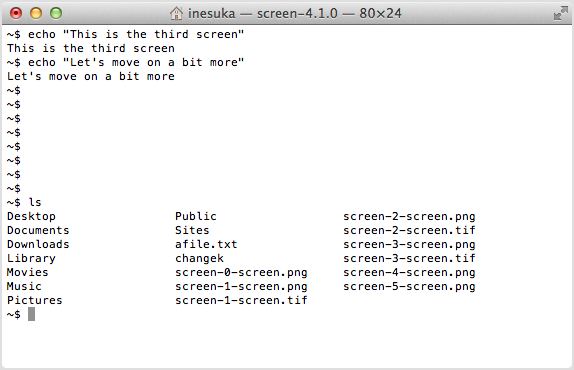
If you type C-a p you will go back to the previous workspace. Try it out, and your terminal should be back at
With C-a n you will go forward to the next workspace. Experiment circling between workspaces back and forth, making sure you recognize them.
Leaving screen
When you are done with screen, or when you want to do something else with your terminal, type C-a d. This will detach your screen, and it will leave you at your initial bash,
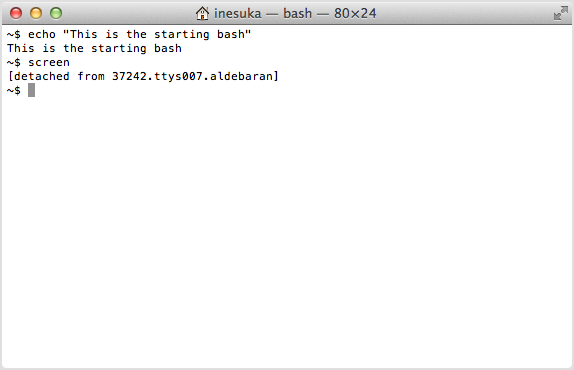
where you can work as usual. Now what’s really nice is that, if you want to go back to your screen workspaces, you just run screen again, this time with the -r switch for reattach,
screen -r
and you’ll be back, moving with C-a n and C-a p among workspaces that remember your previous work and the state your programs were in, as if you had never left.
Actually closing screen
When you are done with it, you close screen by leaving all the shells it is running. You close a shell by typing C-d (remember that C-d means end of file, and is also how you leave the Python interpreter). When you have closed all the shells within screen it will not have further reason to stay alive, and it will exit.
Pre-packaged screen
Like most UNIX programs, screen is easily configurable with a text file. Its configuration file, ~/.screenrc, allows you to pre-load several workspaces. And, while you are at it, you can also give them names, and make them start in different directories. This is how my .screenrc looks like,
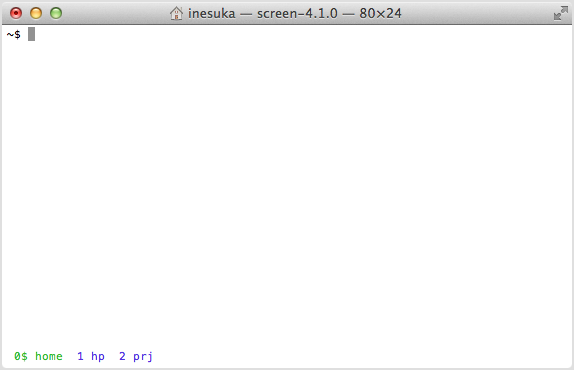
So when I start screen I have three workspaces, labeled home, hp and prj, and a nice text at the bottom of the terminal showing me where I am:
A remote server running screen
In a remote server screen becomes much more than a convenience. A remote server is, for example, the computer hosting your web pages.
When you are working in a remote server it feels just like when you are working at the terminal in your computer, but slower. The main difference is that the computer who’s answering your commands is your server, not yours.
The first thing you do after login in your server, before starting to work, is to run screen. This allows you to keep several tracks in parallel, creating workspaces as you need them. But then you have to disconnect from the server, and you don’t want to stop what you are doing, because maybe one of the workspaces contains a long running program that has not finished, and in another you are editing a file.
So you just detach from your screen, C-a d, and exit the server. The next time you log in you’ll reattach with screen -r, and it will be as if nothing had happened. You’ll be back to your long running program, maybe finished by now, and to the file you are editing, and to whatever workspaces you left when you disconnected.
You can try something similar now: just exit your screen-running terminal. Open a terminal again, then do screen -r. If all has gone well you should be looking at the workspace where you were before you closed the terminal.
The modern alternative: tmux
While screen remains a solid choice, many developers have moved to tmux (terminal multiplexer). It does the same job —managing multiple terminal sessions— but with a more modern approach.
The basics are similar. Where screen uses C-a as its command prefix, tmux uses C-b:
tmux                    # start tmux
# C-b c                 # create new window
# C-b n                 # next window
# C-b p                 # previous window
# C-b d                 # detach
tmux attach             # reattach to session
What makes tmux shine is its pane management. You can split your terminal vertically (C-b %) or horizontally (C-b "), creating a dashboard of terminals in a single view. Picture having your editor on the left, a test runner on the top right, and a shell on the bottom right, all visible at once.
Both tools will serve you well. I still use screen on servers where it’s already installed, but tmux has become my daily driver. The choice, as with many things in the UNIX world, is yours.
Python packages
Another way in which you improve your work environment is by adding functionality to it. Python gives you an easy way to do it.
Say you are a programmer. You’ve been working on a cool problem, you’ve come up with a piece of software to solve it, and you decide to give it to the community.
You want to make it available to other programmers, who may want to contribute to your code. Luckily, you have been using git to keep track of your versions, so you decide to store your software as a repository in Github. Once your software is there it is easy for other programmers to get copies, make improvements, and share them with you.
The chances are not low that there will be other programmers around who want to help, or who can take advantage of your software to help them solve other problems: there were 3.5 million users on Github on April 2013, and on December 2013 Github was hosting 10 million repositories.
You also want to make your software available to users, so you package it up in a way that makes it is easy for other people to install. In this section we’ll be talking about these packages, and how to install them.
The Python package index
Say your hypothetical piece of software is a Python package. If you want to make it as easy as possible for your users to find it you’ll go and register it at the Python Package Index, PyPI for short2. Once your package is listed there your users will be able to find it and install it using a program called pip (or pip3 for Python 3).
Installing Python packages with pip
Installing pip
Python doesn’t come with pip by default, though many distributions include it. Check if you have it:
which pip
If pip is installed, which will tell you where it is. If it is not installed which will stay quiet.
If pip isn’t installed, you can install it using your system’s package manager:
# On macOS with Homebrew:
brew install python

# On Ubuntu/Debian:
sudo apt install python3-pip

# On Fedora:
sudo dnf install python3-pip
Administrative privileges with sudo
You’ll notice the sudo command above. It’s required because software installation needs to write to protected locations on your computer.
On your day-to-day interaction with the computer you are a normal user: you can modify and delete files in your home directory (either /Users/your-login-name/ on macOS, or /home/your-login-name/ on Linux), which is plenty for normal work and keeps the system safe.
But software is usually installed in places where all users can run it, like /usr/local/bin/, and these locations are protected.
When you need to install something system-wide, sudo temporarily grants you administrative privileges. It will ask for your password, and if you’re in the sudoers group, it will run the command with elevated rights. If you’re not, you’ll need to find someone with administrative access to help.
Python offers a mechanism that helps you avoid installing things system-wide. Virtual environments (built into Python as venv) create isolated Python installations for each project. This is now considered best practice for Python development, keeping project dependencies separate and avoiding version conflicts.
Checking the pip installation
Make sure that pip is available:
which pip
You should now be ready to run it, if the shell is able to find it. If it doesn’t —if which does not return a proper location— it might be because /usr/local/bin is not in your PATH environment variable, in which case you should add it:
export PATH=/usr/local/bin:$PATH
A note on package management
While pip remains the standard Python package installer, there’s a new tool worth mentioning: uv. Written in Rust, it’s significantly faster than pip and handles both package installation and environment management. We’ll explore uv in more detail in the Python chapter, where it fits more naturally.
Improve your Python environment with IPython
IPython is a powerful interactive Python shell that makes working with Python much more pleasant. While the standard python shell works, IPython adds features like syntax highlighting, auto-completion, and better history management.
Installing IPython
Installing IPython is straightforward:
pip install ipython
Beyond IPython: Jupyter
IPython evolved into the Jupyter project, which provides notebook interfaces for interactive computing. If you find yourself doing data analysis or scientific computing, Jupyter notebooks let you mix code, visualizations, and documentation in a single document. But for command-line work, IPython remains excellent.
If everything went well you should have now a working IPython installation. Try it out typing
ipython
This should open the ipython shell.
Testing command line completion
Import math,
Then type
and a TAB. IPython will show you all the possible command completions, which are all the functions and variables available in the math module,
math.acos       math.degrees    math.fsum       math.pi
math.acosh      math.e          math.gamma      math.pow
math.asin       math.erf        math.hypot      math.radians
math.asinh      math.erfc       math.isinf      math.sin
math.atan       math.exp        math.isnan      math.sinh
math.atan2      math.expm1      math.ldexp      math.sqrt
math.atanh      math.fabs       math.lgamma     math.tan
math.ceil       math.factorial  math.log        math.tanh
math.copysign   math.floor      math.log10      math.trunc
math.cos        math.fmod       math.log1p
math.cosh       math.frexp      math.modf
This is an extremely convenient thing to have. If you want a quick glance of a module you just import it, then use command line completion to see its contents.
Keep typing: a f, and TAB again:
math.fabs       math.floor      math.frexp
math.factorial  math.fmod       math.fsum
You see where this is going. If you now type ac, then TAB, it will finish the command for you:
Asking for help in Python
When you are in the terminal, interacting with the shell, you ask for help with man. When in Emacs you do M-x describe-function. When you are interacting with Python you ask for help with the function help,
help(math.cos)
When you are in IPython asking for help is even simpler: you only need to do
Playing with Python and math
In the previous chapter we asked the computer to manipulate numbers. It is reasonably easy to convince Python to do simple operations, such as the ones we did, or even combinations of them, such as the average of a list of numbers.
It is a bit more difficult —but very rewarding— to convince your computer to do symbolic math for you. By symbolic we mean that we expect symbols to be manipulated, symbols like the $x$ in the following equation
$$x^5 + 3x^4 - 11x^3 - 27x^2 + 10x + 24 = 0.$$ How about a way to write a program that would perform algebraic manipulations in symbols such as the above, and maybe find the exact values of $x$ for which the equation is true? It is actually quite straight forward if you have the right package installed.
Sympy is an awesome package for symbolic mathematics. Let’s install it:
pip install sympy
Now you are ready to start playing.
Solve equations and plot graphs
Open ipython. First we need the functionality that sympy available. Remember that in order to make the functionality in a package available to the current session we need to import it,
import sympy as sp
but here we are playing a trick. We’ll be using sympy later on, and we don’t want to use the full name every time we call one of its functions. By adding the as sp to the import we define sp as a synonym, so we can type sp wherever sympy was called for.
Once sympy is loaded we define x as a variable,
x = sp.var('x')
After this we can use x in equations. We may, for example, want to solve the previous one. We start by storing it into a variable p, for polynomial,
p = x**5 + 3*x**4 - 11*x**3 - 27*x**2 + 10*x + 24
where x**5 means $x^5$.
Now we can evaluate the polynomial at any value of x simply by running its subs function (for substitute),
p.subs(x, 10)
Note that you can explore it further simply by typing p., then tab: IPython will show you all the possible completions, which include subs and all the other functions defined in p.
Can we solve the equation? Sure,
sp.solve(p, x)
[-4, -2, -1, 1, 3]
Now you may ask, how come I came up with such a nice polynomial as an example, one that has neat roots? I cheated, of course. I defined it as
which was easy to see when it would be zero, and then asked sympy to expand it for me,
sp.expand(p)
I didn’t even have to write it up in LaTeX for nice formatting, sympy did that for me as well:
sp.latex(sp.expand(p))
Can we plot it? We can, with sp.plot. We need to give it the coordinate with which we want to plot, x, and its range:
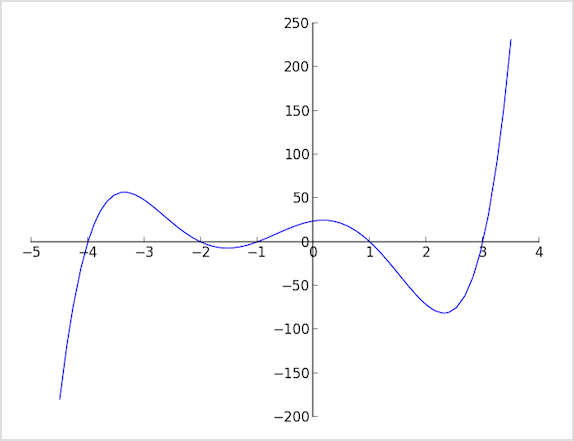
Some familiarity with Python and sympy can do a lot for your appreciation of mathematics, and your ability to explore them.
Only then can you hope to enter what top athletes and many computer programmers call the flow, a state of mind in which you let your mind focus by itself, and in which you can spend many joyful hours feeling as if your work just happens. ↩︎
There are 39361 packages available at PyPI as of 2014-01-14. ↩︎