Learning only happens with practice. Throughout this booklet I shall strive to make it easy for you to actually go to your computer and try things out: but unless you get excited about a project —something you want to build— and start working on it you’ll find it very hard to learn. In this chapter we’ll start a project: we’ll begin a web site.
As we are about to start with a new project, the first thing we need to is to build a home for it in you computer. A directory (or folder, as some people call it) of its own. And we are going to build it with the terminal, because it will be the preferred way to talk to the computer and we might as well start using it as soon as possible.
Start by finding the terminal and opening it. In macOS it is in the Utilities folder, accessible either from the Go finder menu (you’ll see it if you click on the Desktop, for example) or as a sub-folder of Applications. It should be also easy to find in a Linux machine; do make sure you locate it. And, while you are at it, you might consider making a shortcut so that you can open it easy and fast. On the Mac, just drag the icon to the dock.
Double click, and you should see something similar to this:
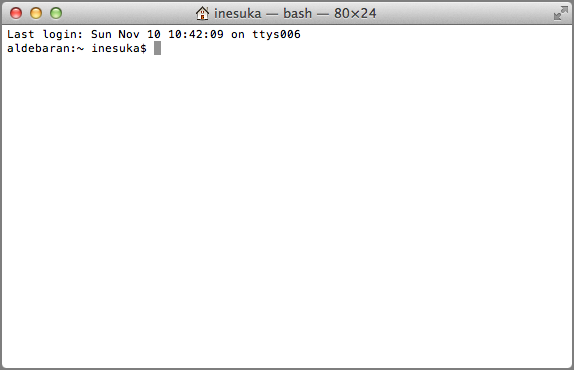
The line terminated with a $ is called the prompt: think about it as the computer waiting for your instructions. You will type things, and it will do what you asked for and write something back.
The program with which you will be talking is not really the terminal. It is called a shell, and it runs within the terminal. The shell that you’ll be using —the one that comes by default with your computer— is most likely bash (Bourne-again shell), though newer macOS versions use zsh by default.
The distinction between terminal and shell is important, because you will be using the terminal to connect to other computers. When you do that you will be running a remote shell, but the interaction will still go through the same old terminal in your computer. Think about the terminal as the window in your computer, and about the shell as the program running inside and waiting for instructions.
Let’s look at what the prompt tells us. First, the computer name with a colon at the end. Then a tilde, ~, which is a shorthand to refer to your home directory, followed by a space and the user name, and a final $.
It is customary that the prompt of normal users ends with $, and the prompt for the superuser (a special, all-powerful user called root) ends in #. This gives a visual clue that alerts you when you are logged in as root, and you can do real damage to the computer.
A note on following this booklet
You should try things out. Don’t be afraid, we won’t be doing anything that can damage your computer. The ability to explore, to do and undo things daring to try them out, is key if you want to do anything of value with a computer.
Type yourself, don’t cut and paste. Remember that you want to build muscle memory. Typing commands at the shell should be effortless and automatic, and the more you practice the more it will become so. The shell is often the best and the fastest way to tell your computer to do things, but only when you don’t have to stop and think. Do it, practice until it becomes second nature.
Nomenclature
Throughout the book we’ll find places where you need to type characters with a modifier, like control or meta (usually the command key or the alt key in macOS). I will use C for control, M for meta, followed with a - and the key. For example, C-d means press control, and with control pressed type d, and C-j n means type control j, then n without control.
The directory structure
The shell always thinks that it is in some directory. (We’ll learn more about how to program the shell in a later chapter.) You may ask where it thinks it is by typing the following command, ended with a return:
pwd
This is how I shall be showing the interaction with the shell: first what you type, and in then what it answers back to you. The $ is the prompt, you are not supposed to type it. After you type pwd your terminal should look something like this:
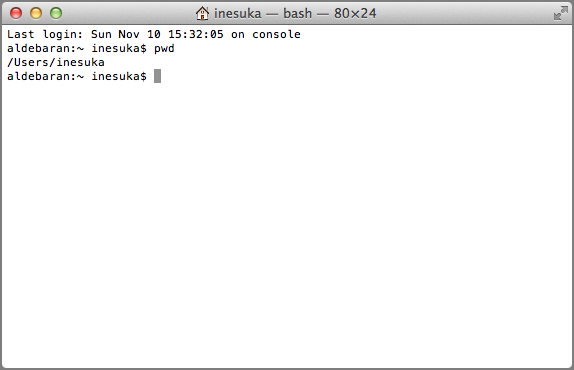
Let’s go back to the results of pwd. If your user name was inesuka this is what you would see:
/Users/inesuka
Notice that it is /Users/, followed by the user name. This is the standard place of a user’s home directory in macOS. In a Linux machine you’d probably get
/home/inesuka
but it is the same thing: the home directory.
Moving to another directory
Let’s explore the directory structure by moving around. You do it with the cd command, followed by the name of a directory. The shell offers you couple of convenient shortcuts for directory names: the directory just above (the parent) of the current directory is .. (two dots), and the current directory is . (a single dot). So if you do this
cd .
you should stay in the current directory,
pwd
/Users/inesuka
but if you do this
cd ..
you should go to the parent directory,
pwd
/Users
You need spaces to separate things, so don’t forget to add a space between cd and ...
Yet another one back,
cd ..
and you are at the root of the directory structure,
pwd
/
from which every directory stems. You can move back to Users,
cd Users
and check where you are,
pwd
/Users
Typing cd with no directory
cd
will take you back home, regardless of where you were.
pwd
/Users/inesuka
Using the ~ shortcut for home will take you there as well:
cd ~
Listing the contents of a directory
The ls command will tell you the contents of a directory,
ls
Desktop Documents Downloads Library Movies Music Pictures Public
Most of the commands you’ll be calling from the shell use the old UNIX convention of allowing you to specify options with dashes and letters. You should know some of them. For example, you may use -l with ls:
ls -l
to get a different, more detailed listing of the contents of the current directory.
Hidden files
The convention is that file and directory names starting with . will be considered hidden, and will not be shown by default. You can use the -a option to show them:
ls -a -l
You may also combine options: ls -al would have been equivalent.
Asking for help
The man program that will tell you pretty much all there is to know about any program. Try it out, man ls. You’ll find yourself looking at the many options that ls offers. You can navigate the manual page typing space (move forward one page) and b (move back one page). Search for a word with / followed by the word to search, then n to see more search results. Type q to leave the manual page and go back to the shell.
Don’t be worried about the many options available. You only need to know a couple or three of them, and that the manual pages are there. Then one day you will need something special, say a way to list the files so that the newest appear first, and you’ll look in the man page to find the option -t,
ls -lt
Creating a directory
Now is the time to make an actual first step towards building our project: make the directory in which it will live. The command to do it is mkdir, followed by the name of the directory:
mkdir changek
Check that it’s actually there,
ls
changek Desktop Documents Downloads Library Movies Music Pictures Public
and move into it,
cd changek
Ready to go. Now we just have to fill it up. But before let me show you a couple of things that will be handy.
Everything is text
Almost everything you care about for controlling your computer, and almost everything you’ll be doing for this project, involves manipulating text. The one exception worth mentioning are images: photos are not text. All the rest is.
When I say text I mean plain old text, as in “a b”, not “a b”. Formatting is not text, but you can use text to instruct the computer to apply formatting to other text. For example, in order to instruct your browser to show the above as bold and italic I had to write *a* /b/, using text codes (*, and /) to tell a program how I want my text to be displayed. When the program I am using converted it into something your browser can understand, it transformed to yet another set of codes: but textual codes they were, just the same.
So forget the word processor paradigm, in which text can be formatted, and you can select a word, right click, and set it to display as italic. In this world of software development and web creation text is text is text, and it has no formatting unless you use other text to specify it following a set of rules.
A conversation with the computer
Everything is text because text is uniquely well suited to maintain a dialogue with the computer. This is the main difference between the ways programmers and non-programmers interact with the computer. We want to maintain a conversation —ask it to do things, and let it answer back. The text supports it, and we need to agree on a language that both the computer and the programmer speaks. Most of this book will be about this language.
Building and manipulating files
In particular, all the programs you’ll be interacting with in the shell will receive commands in text, and return their output in text. For example, the echo command will just produce whatever you send it:
echo "Hi there"
Hi there
Pipes
This might look frivolous, but it is not. Because the shell allows you to link the output of a program to the input of another, simply using |. This is called a pipe, and it is one of the key ideas behind the command line tools, their power and their beauty. Because each one of the tools we’ll be talking about does —very well— one simple thing: it is by being able to combine them using pipes that you can solve complex problems for which you have no single tool.
For example, the very convenient wc program counts words (and lines, and characters). When used with the -w option it will restrict its output to word counts. Try this:
echo "Hi there" | wc -w
2
In case you were wondering. You can also send the output of a program to a file using >, as in
echo "Hi there" > index.html
This should have created the file index.html,
ls
index.html
And you can use cat to output the contents of a file,
cat index.html
Hi there
When you send the output of a program to an existing file using > it will happily overwrite the file’s contents with whatever you are sending. You may instead append to it using >>,
echo "How's that going?" >> index.html
cat index.html
Hi there
How's that going?
The output of cat can of course can be piped to any other program, as in
cat index.html | wc
2 5 27
Note that I didn’t give wc the -w option, so it didn’t restrict the output to word count. It told us that we have 2 lines, 5 words and 27 characters in index.html.
Standard input and output
The channel to which a program sends its output when things go well, and that gets displayed by the shell, is called standard output. The channel from which a program can get input, and to which the shell attaches pipes, is called standard input. There’s another output channel, standard error, that gets used when things go wrong. You see whatever a program spits to it in the terminal just the same, but you’d need special incantations to pipe it around. So when you do this:
echo "going to stdout"
going to stdout
the output went to standard output, which can be piped to the standard input of another program,
echo "piped to the stdin of wc" | wc
1 6 27
Multiple files
You can send more than one file to most programs, just put them separated by spaces. And take into account that the convention is that programs want first the options, then the files. When no file is specified they tend to expect something in standard input, as when it comes from a pipe.
Standard input can also come from you. If you don’t specify a file, it will just sit there waiting: type whatever, then C-d (control d) to tell the program that the input has finished.
Copying and moving
Use cp with two arguments, the origin and the destination, to copy files:
cp index.html index-cp.html
This should have created another file,
ls
index-cp.html index.html
If the last file is a directory the other files will be copied into it. In this case you can have many files, not just two. For example, let’s build a new directory
mkdir tmp
and then copy the two files we have into it,
cp index-cp.html index.html tmp
We have the tmp directory,
ls
index-cp.html index.html tmp
and the two files in the tmp directory,
ls tmp/
index-cp.html index.html
Copying full directories
You may copy a directory and its contents with the recursive -r option:
cp -r tmp another-tmp
This should have created a directory another-tmp with the same contents as tmp,
ls another-tmp
index-cp.html index.html
Moving
To move (or rename) files you use mv in pretty much the same way you use cp. For example, let’s rename another-tmp,
mv another-tmp tmp2
Sure enough,
ls
index-cp.html index.html tmp tmp2
Or make another directory, and move to it everything in tmp2:
mkdir tmp3 ; mv tmp2/index-cp.html tmp2/index.html tmp3
We have used a ; to separate two commands in a single line.
ls tmp3
index-cp.html index.html
Now tmp2 should be empty,
ls tmp2
Deleting
You may remove a file using rm. For example, create a disposable file,
echo "trash" > not-wanted
Make sure it’s there,
ls
index-cp.html index.html not-wanted tmp tmp2
then remove it, and remove also the index-cp.html that we made in the previous section
rm not-wanted index-cp.html
ls
index.html tmp tmp2
Removing directories
You can use rmdir to delete directories, but only when they are empty. It should work with tmp2, which we emptied in the previous section,
rmdir tmp2 ; ls
index.html tmp
Recursive deletion
As with cp, you may use the -r option to recursively remove a directory and its contents. Let’s get rid of the tmp and tmp3 directories,
rm -r tmp tmp3 ; ls
index.html
The most efficient way to make a costly mistake and get rid of all your work is to use the -rf options of rm, which means remove recursively all directories and files, and force removal. I’ll always remember when a fellow PhD student did rm -rf ~ and wiped out a full year of not-backed-up PhD work. Don’t do it, and do make backups.
Multiple names for files
A trick you’ll find useful is the ability to give files several names. They are called symbolic links, and are made with the ln program. Let’s make another file,
echo "for symlinking" > original.txt
and then a symbolic link to it,
ln -s original.txt synonym.txt ; ls
index.html original.txt synonym.txt
As synonym.txt is just another name for original.txt, if we modify one we modify the other:
echo "another line" >> synonym.txt
and check the original,
cat original.txt
for symlinking
another line
Wildcards
The shell allows you to use * as a wild card in the names of files. It matches any number of characters in file names, and you can combine with letters. For example, let’s create a couple of files,
echo "second file" > another.html
and
echo "third file" > and-yet-another
If we want to do something with all the files ending with html we can say
ls *.html
another.html index.html
But if we want all the files that have another in the name we could do
cat *another*
second file
third file
Completion
The shell will try to make your life simpler by completing whenever it can, and offering you options, when you press tab. Try it out: type wc, space, a (as if you were going to write the name of a file starting with a), and then tab. You will see that it writes an n, because all the files starting with a follow with an n. Press tab twice, and it will show you what files you have that start with an; type another letter, like a d, and the next tab will fill the full file name.
Command line history
Finally, you can go back in your command history. Just type the up arrow or C-p (control p). Most convenient, you can also search back. Type C-r, then start typing whatever you are searching. When it appears type enter to execute, or start editing it.
Clean up
It has been a long and full chapter. Once you have mastered it you will have advanced a lot. Practice, try things out.
Let’s finish by cleaning up,
rm *another*